Daydream Painting
PROCEDURE:
1. I took pics of my Year 8 students pretending to daydream. I printed them out on photo paper so that we would have a high quality image.
2. Art Appreciation: we looked at Surrealism and Surrealist artists like Dali. We explored the idea of non realistic objects and how emotion can be created by the placement of objects (composition.
3. We looked at composition techniques - Rule of Thirds, leading lines, framing, horizon placement and types of perspective.
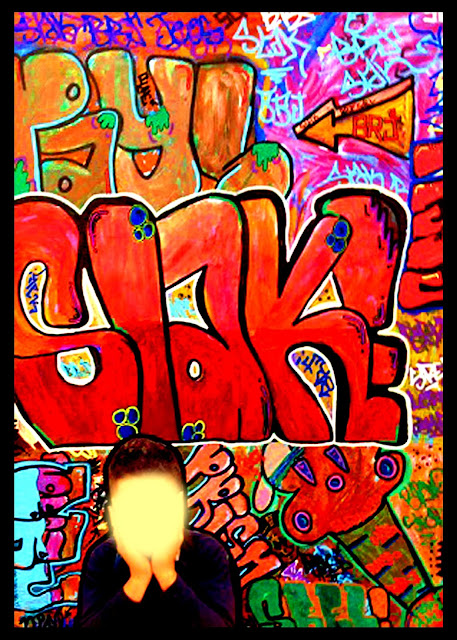
4. Students had to create a surrounding background design that showed the viewer what they were daydreaming about. They had to consider composition, colour schemes, etc.
5. Once a design was decided upon, it was drawn up onto a canvas. The portrait was cut around, placed into position within the background design and traced around. The portrait photo was glued onto the artwork last.
6. Students began their paintings by "blocking in" shapes. This artwork created an opportunity for students to learn how to put a painting together as layers and building towards the detail as opposed to doing the detail first (art practice).
7. Students had to use opposing colours in their layers - warm on cool, cool on warm. We used good quality paint as students were dry brushing.
8. Students made the decision when their painting was finished.
9. Students had the option of adding details with Posca pens, metallic markers, black markers, lead pencil, charcoal, coloured chalk pastels.
10. Lastly, the portrait was glued down into position.
I loved doing this artwork with my kids. I think they enjoyed learning how to layer paint and developing some painting skills. Here are some examples......there are quite a few.....


1. I took pics of my Year 8 students pretending to daydream. I printed them out on photo paper so that we would have a high quality image.
2. Art Appreciation: we looked at Surrealism and Surrealist artists like Dali. We explored the idea of non realistic objects and how emotion can be created by the placement of objects (composition.
3. We looked at composition techniques - Rule of Thirds, leading lines, framing, horizon placement and types of perspective.
4. Students had to create a surrounding background design that showed the viewer what they were daydreaming about. They had to consider composition, colour schemes, etc.
5. Once a design was decided upon, it was drawn up onto a canvas. The portrait was cut around, placed into position within the background design and traced around. The portrait photo was glued onto the artwork last.
6. Students began their paintings by "blocking in" shapes. This artwork created an opportunity for students to learn how to put a painting together as layers and building towards the detail as opposed to doing the detail first (art practice).
7. Students had to use opposing colours in their layers - warm on cool, cool on warm. We used good quality paint as students were dry brushing.
8. Students made the decision when their painting was finished.
9. Students had the option of adding details with Posca pens, metallic markers, black markers, lead pencil, charcoal, coloured chalk pastels.
10. Lastly, the portrait was glued down into position.
I loved doing this artwork with my kids. I think they enjoyed learning how to layer paint and developing some painting skills. Here are some examples......there are quite a few.....


Comments
Post a Comment