MICROSCOPIC MONSTERS - Primary School - Water-based markers as watercolour
I have had a lot of students ask me to show them how to draw or create a cartoon character. Their expectation of what they think they can do is so different to what I have seen them do. So, I created an artwork whereby they can create a cartoon character that will meet their expectations (I hope).


I think its the eyes that create the appearance of a "cartoon" and the character of a germ is pretty simple. Make it look scary but cute!! It's all about using your imagination!!!
PROCEDURE:
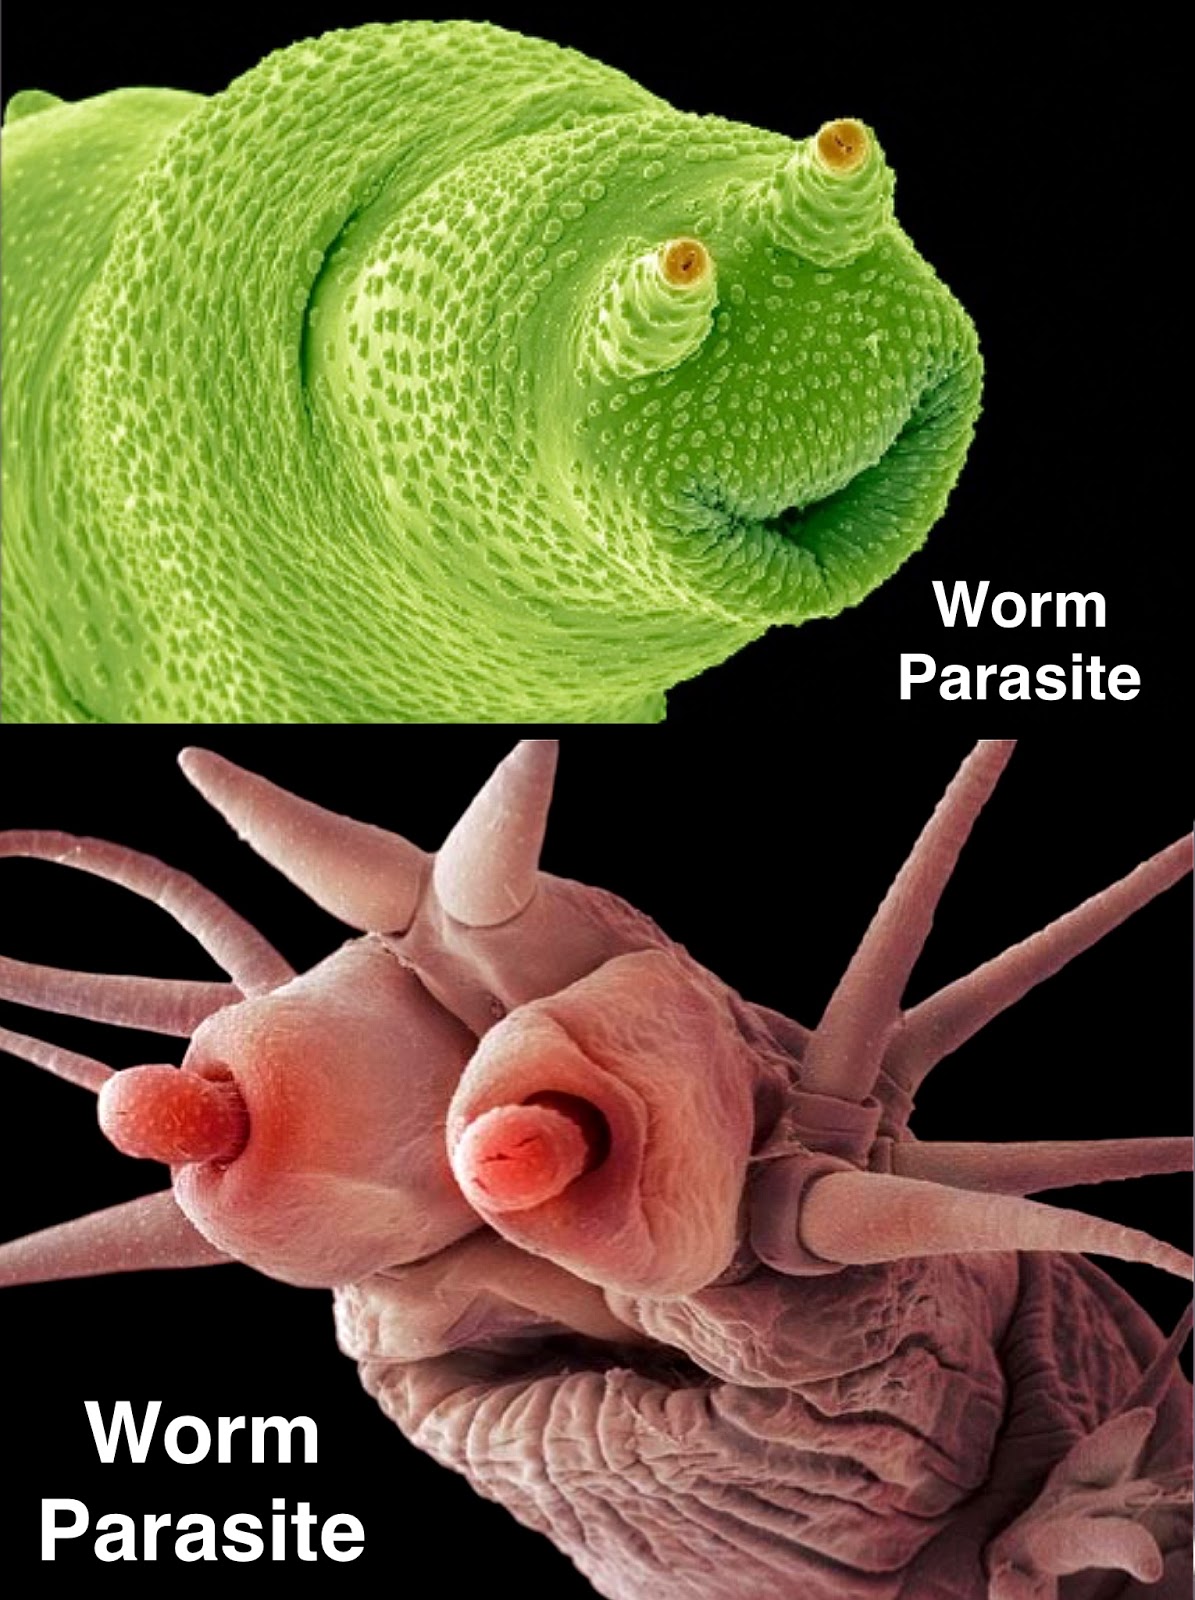
1. I showed the students pics of microscopic organisms and we chatted about how they look scary but are sort of cute looking. Some kids really freaked out at the fact that these organisms are so small that you need a scanning electron microscopic to see them. It really grabbed their attention and they got really excited.


2. On an A4 piece of watercolour paper, I had students sketch up one of the organisms hsown to them. I had them printed out as Resources Images so they could see them up close. I told them that they did not have to copy the image exactly, but use it as a guide. They could leave parts out or even add some parts from a different organism. I did have to slow some students down as their "monster" was becoming a mess of arms, legs, teeth and other body parts that were unrecognisable!!

I showed them my sample drawing and showed how I had added extra bits and pieces.
3. We then drew into the pencil image with a wax candle, adding extra lines into the "monster". In the background, I had students draw little germ-like things with first drawing them with a pencil. They really liked this idea.
4. With water-based textas (markers), students coloured the entire artwork. It is important that they do not scribble but colour fairly neatly. The aim is to get colour/pigment onto the paper so that when water is added later, the effect resembles watercolour.
I really love working with this technique. The effect is so bright and colourful and, if coloured properly, never fails to work.
5. Water is applied to the artwork with a brush that is soft but has stiff bristles (sounds contradictory). Water should be added in small amounts with a slight rubbing motion. The texta colour wont appear to do much until the water is absorbed by the paper. It then dissolves and blends really nicely.
6. Applying the water properly is very important with this art making technique. To maintain the brightness of colours, water needs to be applied separately to each other. Some bleeding of colours does happen.
When I apply the water, I do the background first. I also start with all the light colours first, working my way through to the dark colours. This keeps the colours fresh and allows for areas to dry a little between water applications. I always give a demo, showing the "right way" and the "wrong way".
7. The artwork must be completely dry before adding black outlines. Go over the artworks with my trusty hairdryer to make certain the works are dry.
8. Students trace over the original lead pencil drawing. It may become lost under all the watercolour work. On my artwork I incorporated the parts of the outline that had bled to achieve a wiggly outline in some areas. Students need to apply some thicker lines and thin lines to created interest and avoid the same line appearing throughout the artwork. I usually give a demo here as well.
9. In the background, I used a red Sharpie marker to outline my "germs" then a further outline with an Artline fine tip pen (0.8) Using the Artline for additional detail is optional.


Comments
Post a Comment