Portraiture - Artwork 4 - Body of Work - Drawing and Digital Art
ARTWORK 4: Cubist style Artwork - Percolator iPad App
PROCEDURE:
1. Again, we took a pic of their self portrait drawing and imported it into the program.
2. I had student use particular settings/effects that created easy to see circles. They would need to be able to see the edge of the circles to successfully complete Step 3. (Can't remember what the settings were...it was 4 years ago. You could play around with the settings/effects to achieve what you want)
3. With a fine tip Artline pen, students re-daw their original self portrait drawing. They must use the edges of the circles to create a distorted outline.
Some students struggled with this idea but once they got the hang of it, they were ok. Straight lines are forbidden!!!!
4. Using a thin black marker or a coloured Posca pen, students now trace over their Artline drawing to establish a clear outline. Thick markers or Posca pens will cover up too much detail.
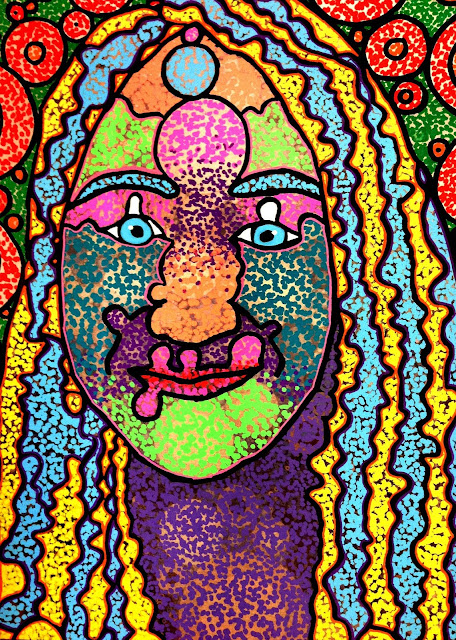
5. Using stippling, students add tone to their artwork. We used Posca pens and metallic markers.They need to determine which circles, if any, are left as part of the image or covered with the stippling. I encouraged students to leave some circles revealed/untouched as I thought it added interest to the overall artwork.
6. Choice of colour or how much colour to use was the prerogative of the student, but I did need to give some guidance when students got carried away with too much colour.
Here is one result that uses lots of colour. Student artwork.......
 The artworks following are my sample works to show the kids and use to demonstrate how to recreate the portrait using the circles as a guide.


PROCEDURE:
1. Again, we took a pic of their self portrait drawing and imported it into the program.
2. I had student use particular settings/effects that created easy to see circles. They would need to be able to see the edge of the circles to successfully complete Step 3. (Can't remember what the settings were...it was 4 years ago. You could play around with the settings/effects to achieve what you want)
3. With a fine tip Artline pen, students re-daw their original self portrait drawing. They must use the edges of the circles to create a distorted outline.
Some students struggled with this idea but once they got the hang of it, they were ok. Straight lines are forbidden!!!!
4. Using a thin black marker or a coloured Posca pen, students now trace over their Artline drawing to establish a clear outline. Thick markers or Posca pens will cover up too much detail.
5. Using stippling, students add tone to their artwork. We used Posca pens and metallic markers.They need to determine which circles, if any, are left as part of the image or covered with the stippling. I encouraged students to leave some circles revealed/untouched as I thought it added interest to the overall artwork.
6. Choice of colour or how much colour to use was the prerogative of the student, but I did need to give some guidance when students got carried away with too much colour.
Here is one result that uses lots of colour. Student artwork.......

Completed Artwork

Percolator Image


Comments
Post a Comment